Understanding the Display / APX Micro Controller
Learn to read the APX Micro controller display
The APX Control System has two display options: Split Screen and Auto Scroll. Split Screen shows all compartment temperatures and setpoints in one view. Auto Scroll shows one compartment at a time, cycling through active compartments.
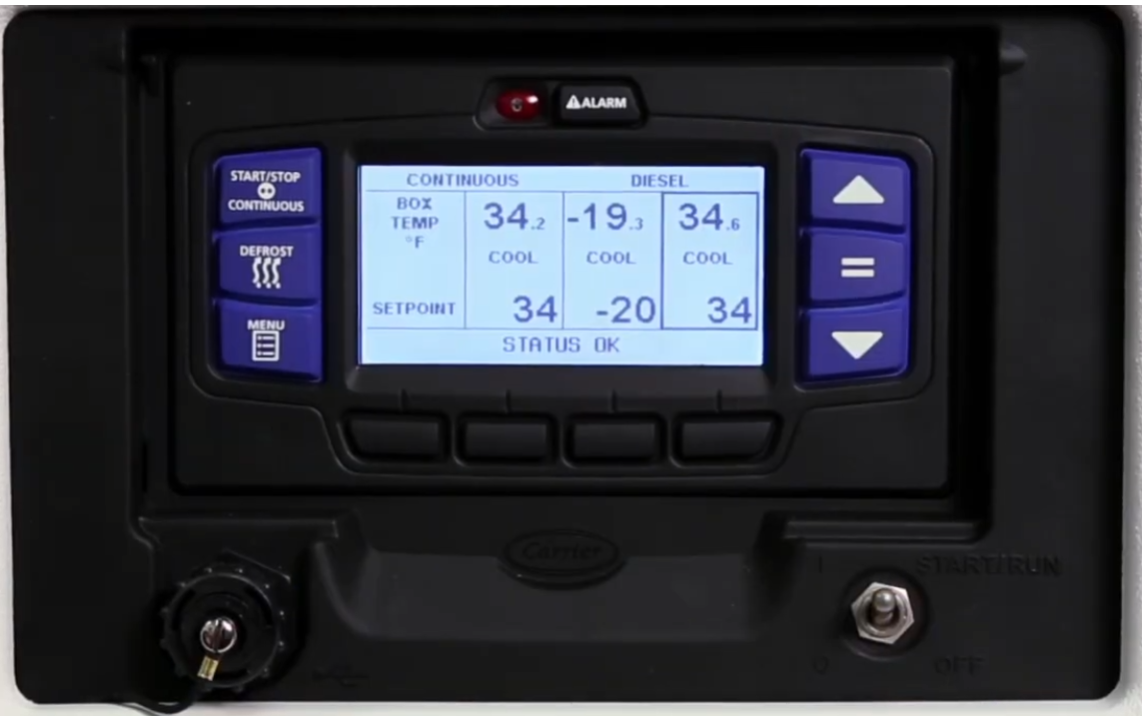
The display has these sections from top to bottom: • Status bar (top) — shows operating mode (CONTINUOUS, START/STOP, DIESEL, STANDBY/AUTO) • Box Temperature row — shows current actual temperature in each zone • Operating Mode row — shows COOL, HEAT, or OFF for each zone • Setpoint row — shows the target temperature for each zone • MessageCenter (bottom) — shows status messages, warnings, and alarm info
C1 = left display box = front compartment (Host Unit) C2 = middle display box = rear compartment (Rear Evaporator) C3 = right display box (not used on this 2-zone trailer)
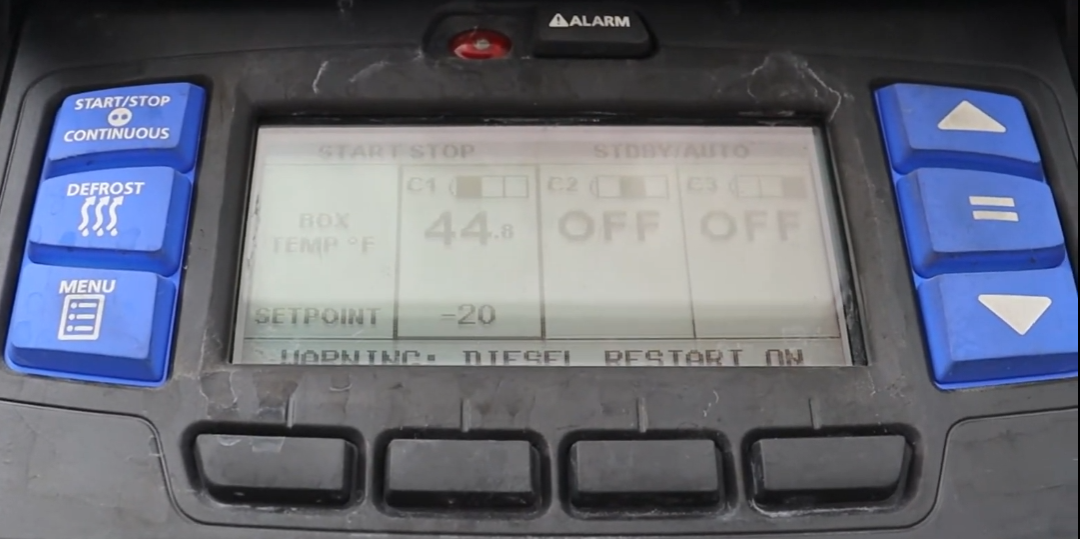
• BOX TEMP °F — The current actual temperature in each zone • SETPOINT — The target temperature you want each zone to reach • "COOL" — Zone is actively cooling • "HEAT" — Zone is actively heating • "OFF" — Zone is inactive • The highlight box cycles between active compartments
• MENU — Access system menus and settings • DEFROST — Initiate manual defrost cycle • START-STOP/CONTINUOUS — Toggle between operating modes • ALARM — View and acknowledge alarms • UP/DOWN arrows (▲▼) — Adjust setpoints and navigate menus • EQUALS (=) — Confirm and save changes (CRITICAL button!) • Soft keys — Context-sensitive buttons below the display